Introduction
I wanted to setup a redundant AnyNode Setup for testing purposes. I was thinking what would be the easiest way to achive this setup. I came up with two ideas:
- Setup a Loadbalancer between the PBX and the SBCs
- Use virtual IPs
To my delight AnyNode supports virtual IPs and Failover, so it was pretty easy to set everything up.
The Setup
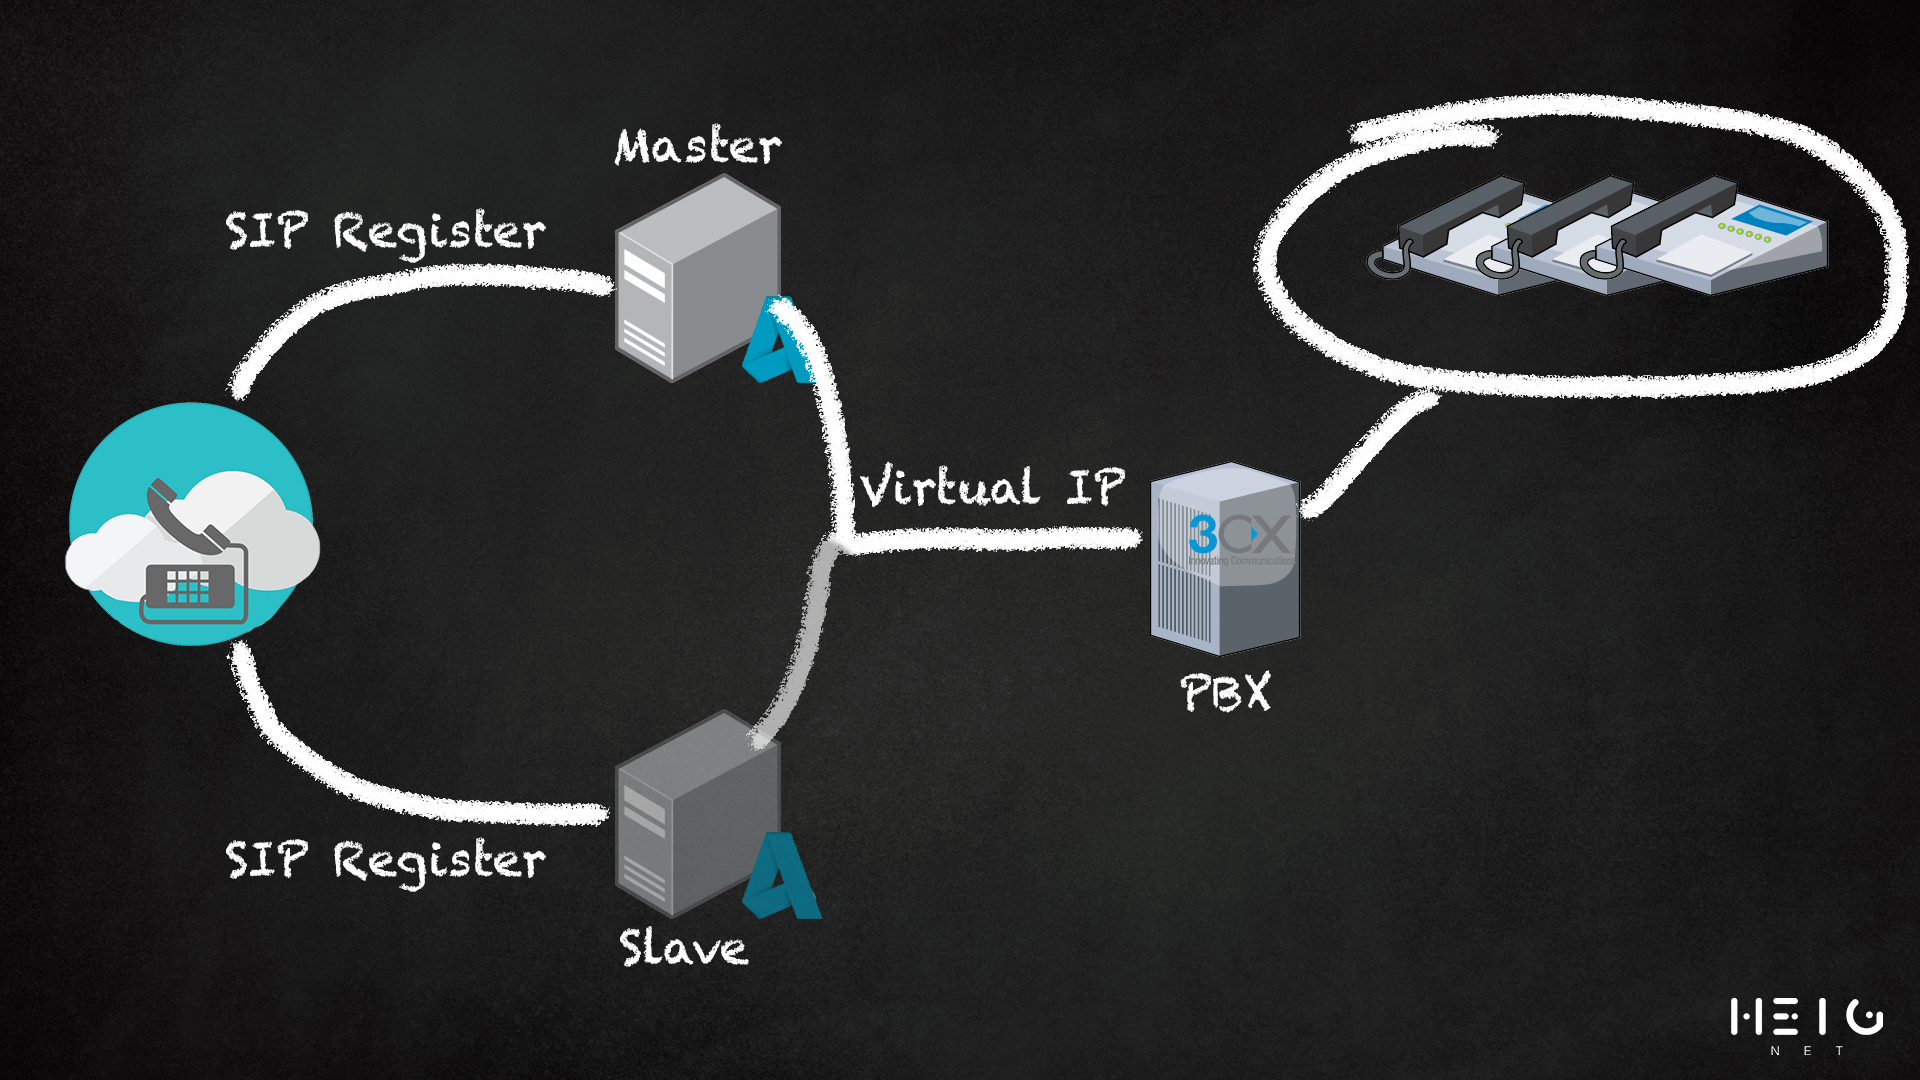
The setup consinsts of two AnyNode SBCs running in a Active/Passive Cluster and a 3CX PBX with attached IP Phones.
What is a virtual IP?
A virtual IP is not fixed assigned to one Interface. It can be assigned to several Interfaces - but not at the same time. In this case, always the active SBC has assigned the virtual IP Address. That means, that only this one SBC is reachalbe using this IP. But: if the active SBC becomes inactive (Reboot, power loss, connection issues...) the second SBC will decide, that he is now active and assign the virtual IP to himself. So the other SBC becomes active and takes over the job.
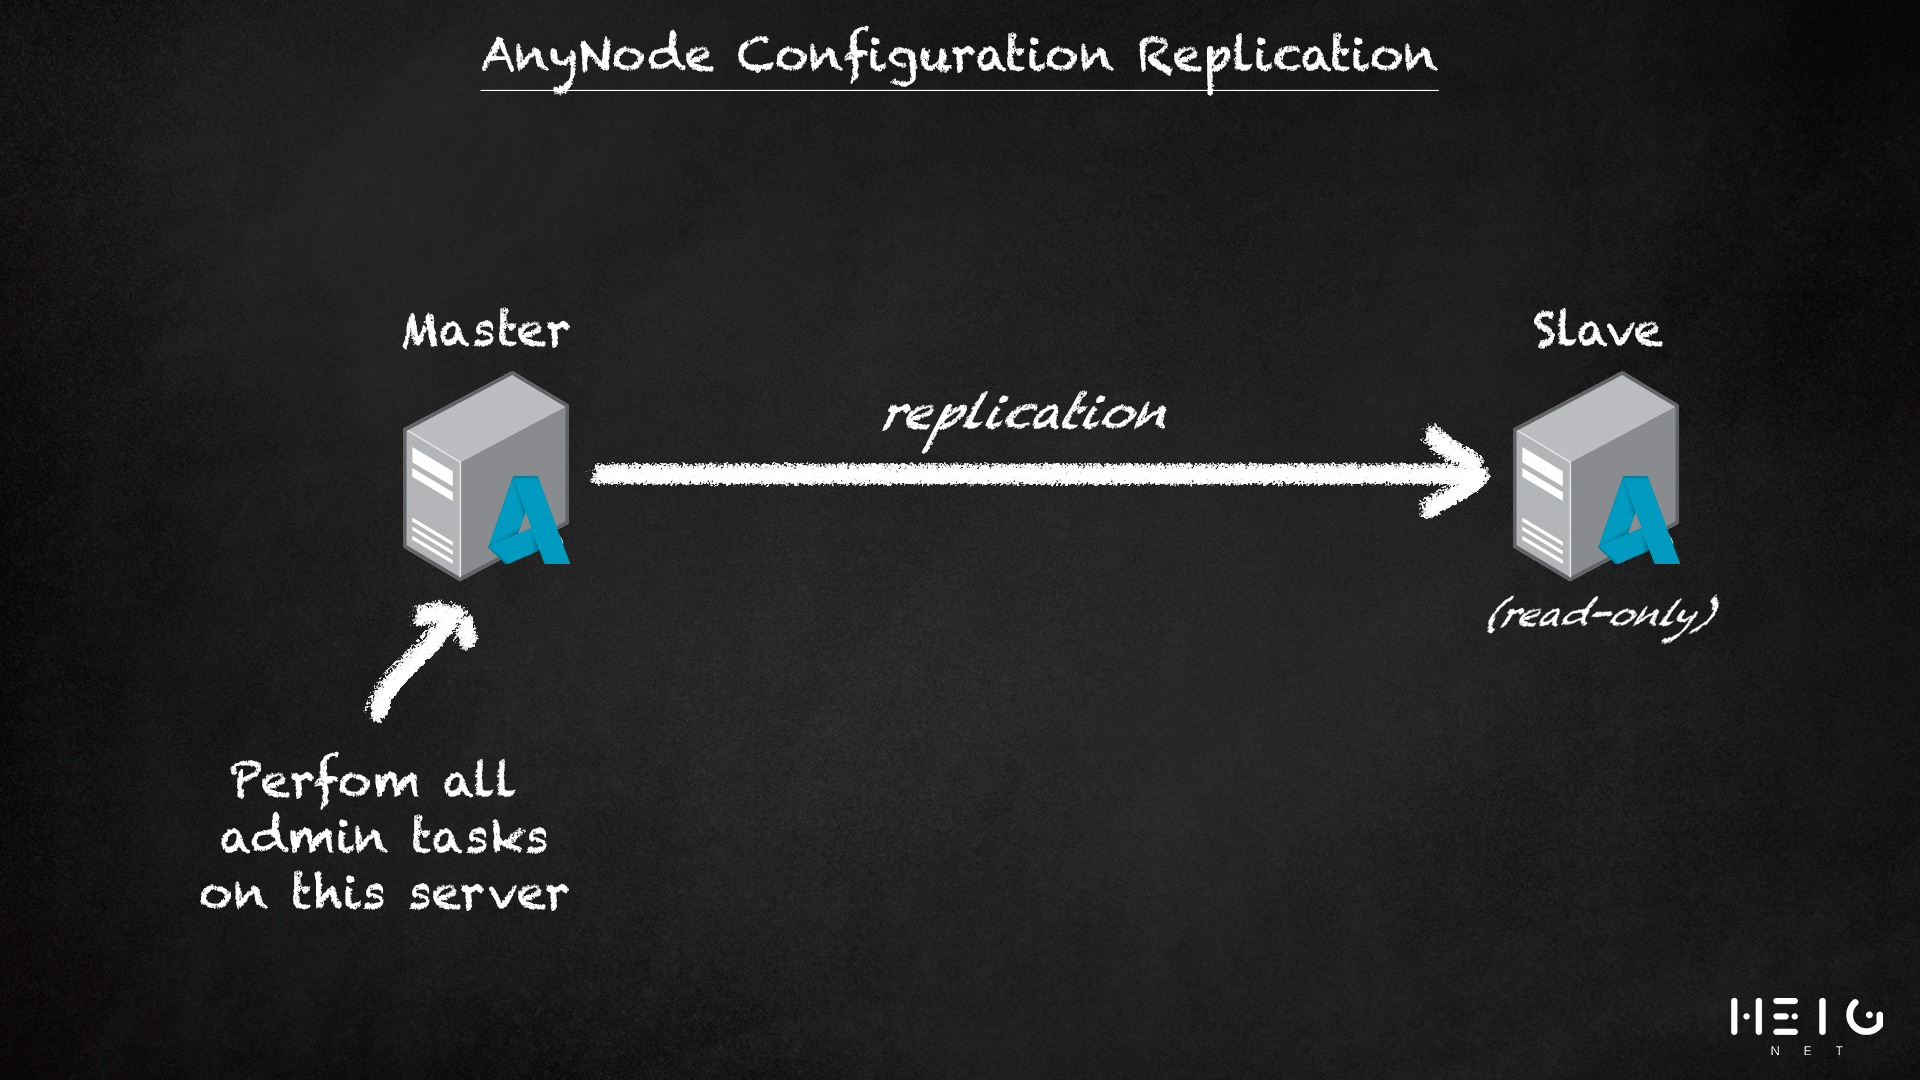
And what about the configuration?
AnyNode allows you to have an automatic replication of the configuration between both SBCs. So they are always up to date with your current configuration. Note: You can only change the configuration on the master SBC!
Let's start!
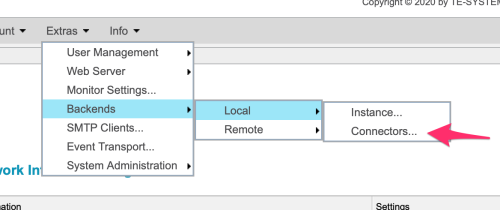
Slave Setup
First connect to your slave system and let's create a connector to replicate the configuration!

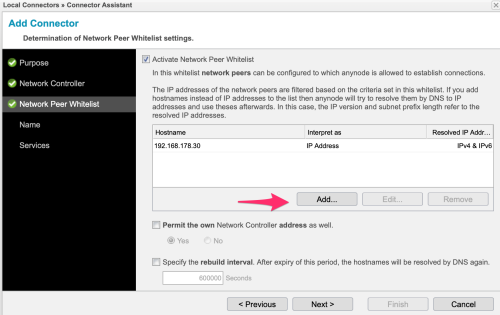
Choose the IP Address that should be used for replication:
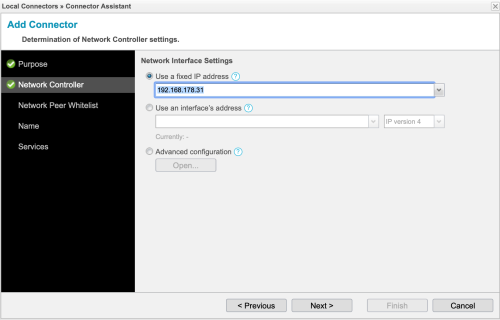
Enter the IP Address of the master system
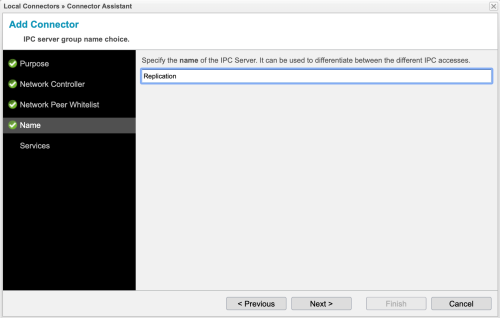
Enter a Name for this Connector
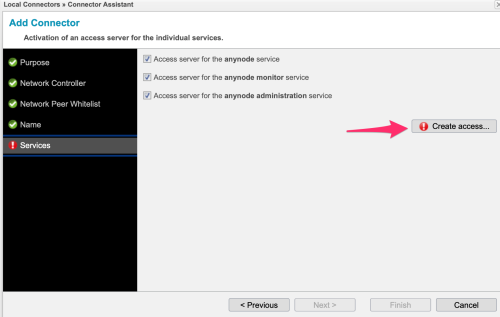
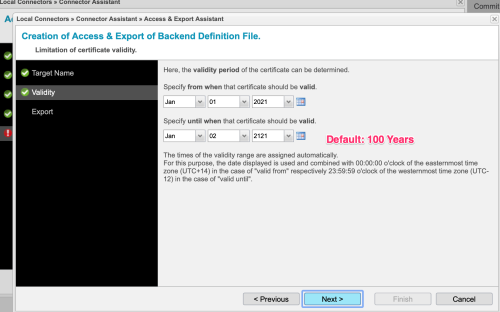
Make sure to create the access token!

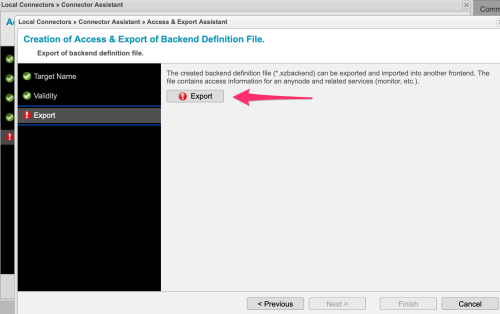
Don't forget to export the configuration and save it!
Once you have finished the setup on the slave system, let's move to the master
Master Setup
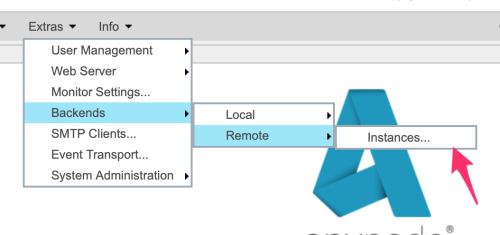
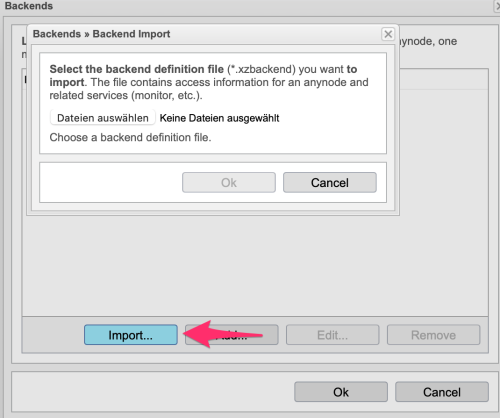
Go to the Remote Backend Instances and import the access file you just exported.
Now you have successfully connected your master and slave SBC. You can switch between both in the top right corner:
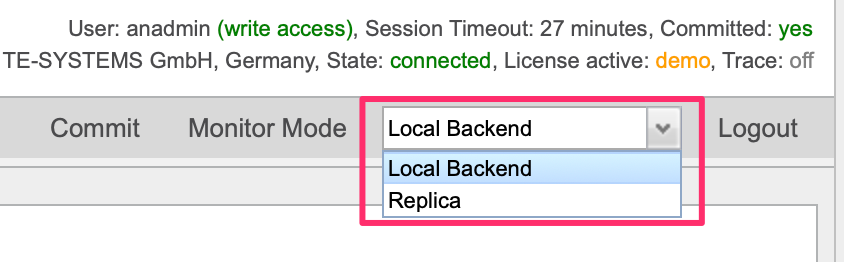
Note: the replica will always be in read-only mode!
Virtual IP Setup
Now that we have managed to replicate our configurtion, we can move on to the virual IP.
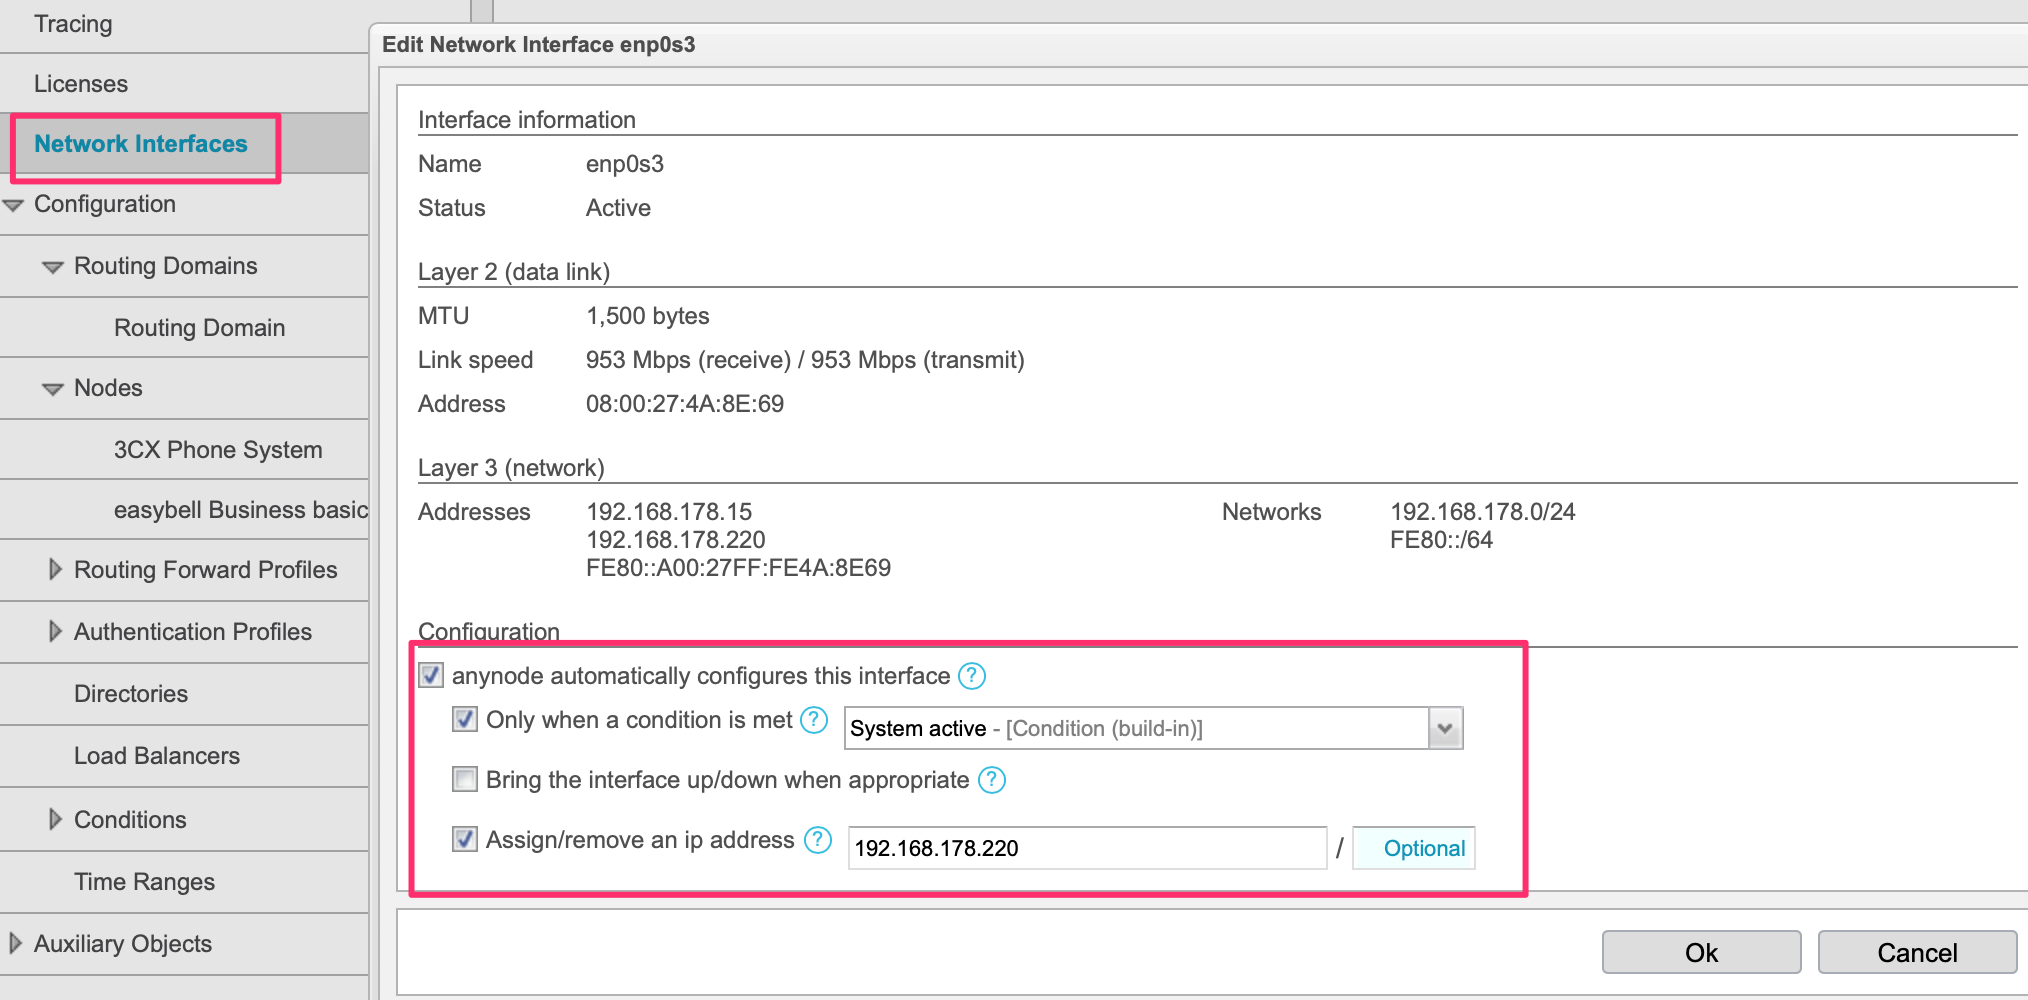
On both systems (master and slave) perform these steps!
Go to Network Interfaces and configure your network interface. Allow AnyNode to configure the interface and provide the condition as well as the IP Address:
That's it! Your done. From now on, the slave system will take over once the master is down.